How to Test a Salt Cell: The Bucket Smell Test and Diagnostics for Technicians
When a control panel indicates a salt cell issue, it typically throws flow switch errors, low chlorine warnings, or suspected electrode failure codes. Field troubleshooting must be approached modularly. The salt cell’s anode is the most critical and expensive component of the system. Compared to the power supply or other internals that require teardowns or a multimeter to diagnose, the salt cell anode is the most straightforward component to isolate. Therefore, it should be your primary target when initiating pool salt generator troubleshooting on-site.
Why the Manual Chlorine Smell Test is Essential for Field Diagnostics
Digital control panels contain numerous electronic components and complex sensor arrays. These circuits are prone to glitches, frequently resulting in false error codes. Blindly replacing parts based solely on digital alerts wastes money and delays route schedules. Even with a panel error, you must troubleshoot from the ground up. A salt cell may fail to produce hypochlorite simply due to calcium scaling or exhausted coatings. While digital salt cell diagnostics are helpful, a manual chlorine smell test verifies the actual physical output, preventing misdiagnosis and saving valuable repair time.
Step-by-Step: How to Perform the Salt Cell Bucket Test
The bucket test is a straightforward process to test a salt pool cell. Follow these steps for accurate results:
- Prepare a highly concentrated saline solution: Mix 5 grams of pool salt per 1 liter of water to create a 5,000 ppm solution. Fill a plastic bucket with enough of this solution to fully submerge the salt cell’s internal plates.
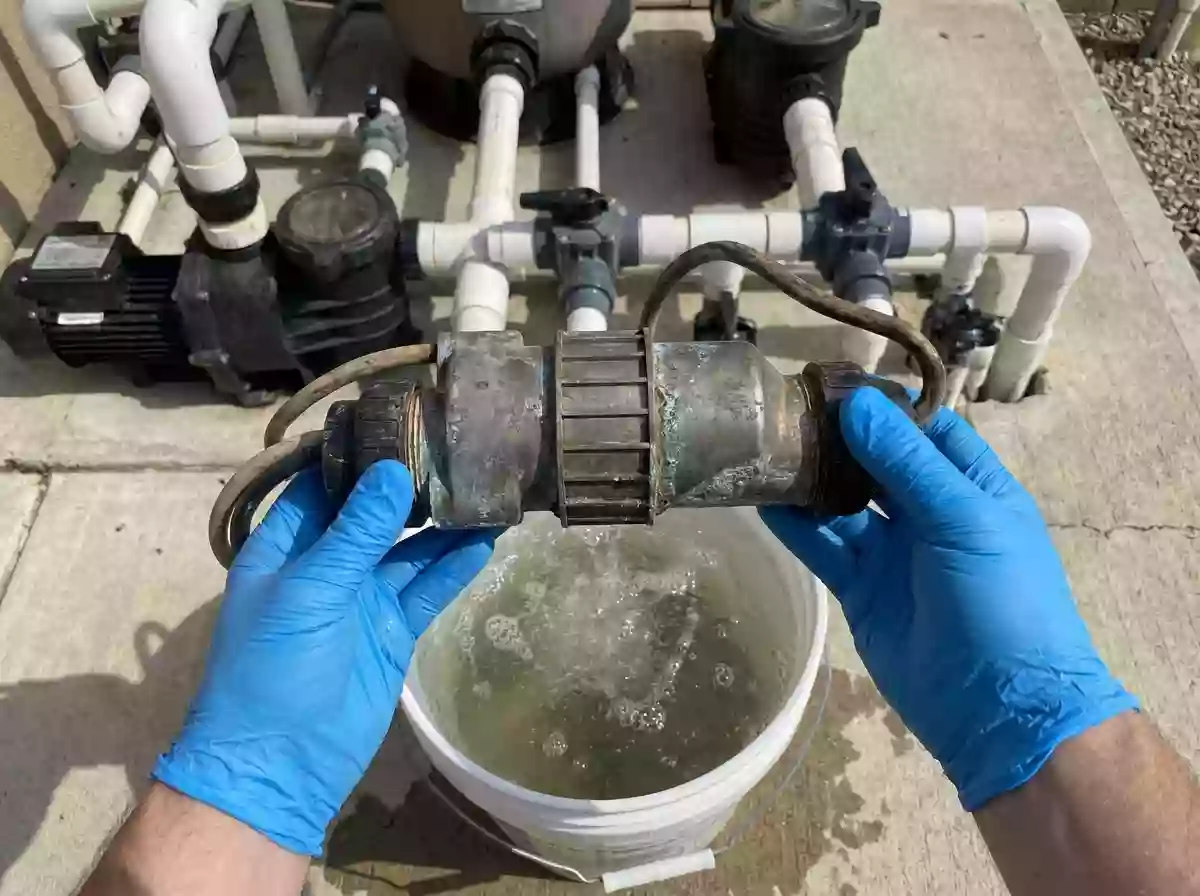
- Submerge the unit: Place the salt cell into the bucket, ensuring the titanium electrode plates are completely underwater. Keep the cable connectors fully exposed to the air. Submerging the terminals will cause a direct short circuit between the positive and negative poles, halting electrolysis entirely.
- Power the system: Connect the unit to the control board and activate the system (you may need to manually bypass the flow switch). If the board is faulty and you understand DC circuitry, use an external DC power source. Apply exactly 5V across the anode and cathode. While the current density on the titanium plates may temporarily exceed design specifications, this short burst will not damage the hardware.
- Observe the reaction: Once powered, visually inspect the plates. You should see dense, milky micro-bubbles rapidly forming—chlorine gas at the anode and hydrogen gas at the cathode.
The Wafting Technique: Verifying Active Electrochemistry
This is the critical step to confirm whether your titanium plates are still functioning. Never place your face directly over the bucket, as concentrated chlorine gas is extremely harsh. Let the salt cell run for one minute. Then, use your hand to gently sweep (waft) the air from above the bucket toward your nose. If you detect a sharp, highly distinct chlorine odor, your titanium anode is functioning properly. If there is little to no smell, despite the presence of bubbles, the MMO (Mixed Metal Oxide) coating is compromised, indicating your titanium plates have failed. This is how to tell if a salt cell is bad without relying on digital sensors.
Beyond the Bucket: Identifying Coating Depletion and Hardware Failure
If your bucket test yields no chlorine smell, proceed with these physical inspections:
- No bubbles present: This indicates a short circuit between the titanium plates and the power source. Use a multimeter to measure the continuity and voltage at the titanium plates and power terminal connections.
- Bubbles present, but no smell: Inspect the titanium plates for physical pitting or coating delamination. If you observe either, you must proceed with a salt chlorinator cell replacement. If the plates appear physically intact but are covered in white buildup, you need to clean a salt cell using a mild acid wash. After acid washing, check again for coating loss. If none is found, repeat the bucket test.
Sourcing Reliable Replacement Salt Cells for Your Route
When you confirm a dead unit, you need a reliable replacement salt cell. While OEM branded cells carry a high premium, the manufacturing process behind them is standard across the industry. Top brands rely on contract manufacturing. To lower costs for your clients and scale your pool service business, partner with Century to manufacture your own private-label salt cells. You can even pair them with a custom power supply brand to increase your market authority and profit margins. If you are ready to upgrade your hardware sourcing, contact us today.